Partial Solution to the Track Merging Problem
A "Bob's Track Builder" TutorialBy R Soul
Update (June 2010): I have made a video tutorial that shows you how to merge the tracks, whatever direction they go in. It is a full solution, meaning it's much better than this tutorial.
See this thread on the BTB forum.
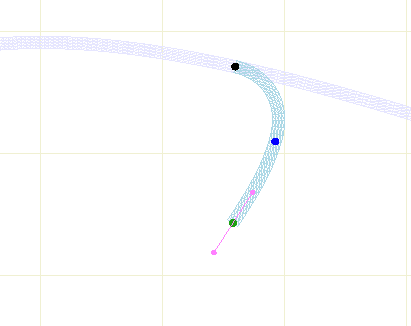
For the purposes of this tutorial, the names Track 1 and Track 2 will be used. In the above image, Track 2 is the short track.
It is recommended that you watch the track merging tutorial on the BTB website, as that method doesn't involve too much time or effort, and can yield some very good results.
It is also recommended that you read through this tutorial all the way, so you know what lies ahead, and the limitations of the methods employed. Then you can go back to the start and perform each step in your own BTB project.
Preparation
The first time you try this should be with a new project. Position Track 2 so that it is entirely underneth Track 1, so that it dosn't cut though. Another useful thing you can do is to give one track dark texture and the other track a light texture. This will make it easy to see if and where they do cut through each other. A third thing that will make the process easier is to swith the 3d view to wireframe & textures (via the W key):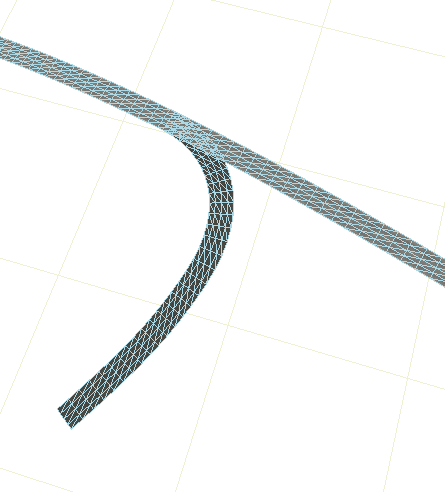
It should also be noted that the tracks shown in this tutorial do have some gradient, so I haven't taken too many shortcuts, except that those gradients are quite smooth.
Step 1: Simplify the Problem
Activate Track 2, and generate a new surface which lines up with the point where Track 2 leaves Track 1: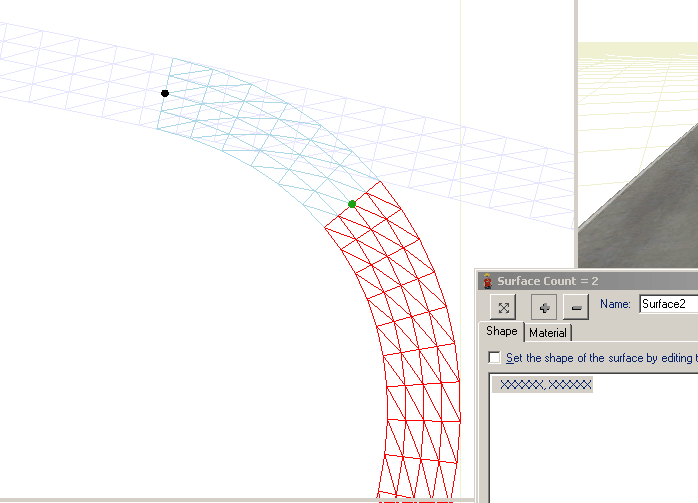
Go back to the first surface, and increase the Panel Length so that there is just one panel between surface 1 and surface 2:
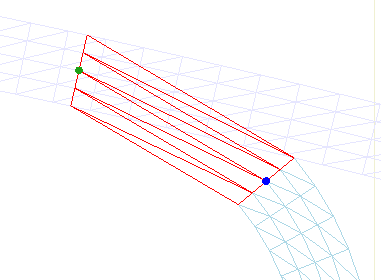
In this image, a value of 30 was used, so don't be afriad to use large numbers.
It may not look very nice, but you will be adding more surfaces between these first two, which will smoothen the curve again.
Step 2: Add More Surfaces
Look at Track 1, and notice the lines which go across the track: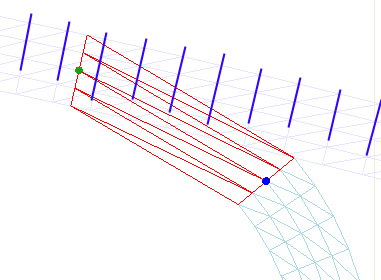
You need to add surfaces to Track 2 which line up with the lines which cross Track 1 (there's no need to reduce the panel length):
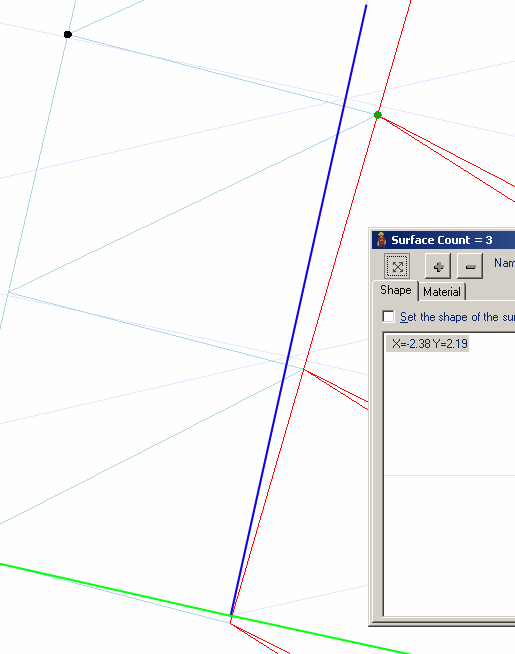
Allow BTB to set the names of the surfaces, so that if you add one between Surface1 and Surface2, the previous Surface2 will be renamed to Surface3, and your new one called Surface2
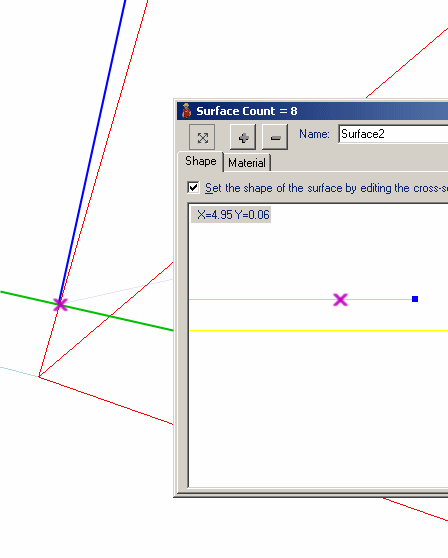
It is rather difficult to see what's going on here, so some things have been highlighted. The blue line is going across Track 1, and the green line is the edge of Track 1. The red lines are the surface which has just been added to Track 2.
Things become easier to explain when adding the next surface, because the screenshot can be taken from further away:
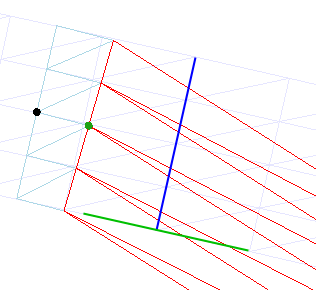
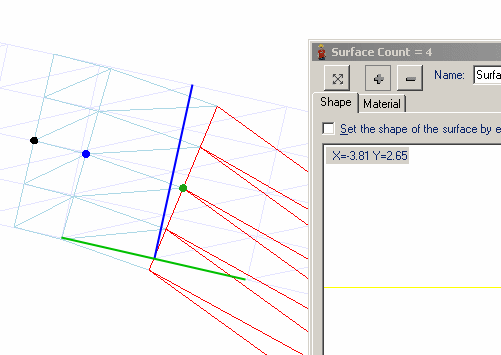
It should now be easy to see that the each surface of Track 2 needs to intersect the point where the line across Track 1 meets the edge of Track 1. Add more surfaces so that each line across Track 1 meets a new surface across Track 2:
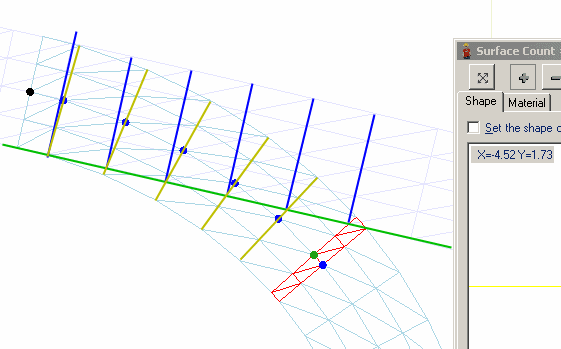
Note that the final surface is very short, but it should still be added.
Step 3: Change the Surface Shape
In this step you'll be creating new points in the cross-section of Track 2, and moving them up or down until those points meet the edge of Track 1. This will also add more polygons, which will complicate the view somewhat. To make things easier (or not as difficult), edit the cross-section of Track 2 and delete all but the two outside points: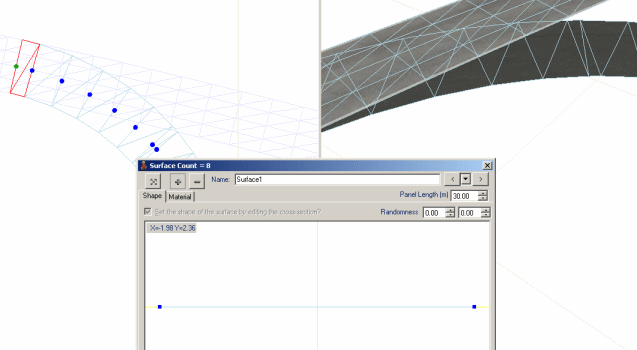
Go to Surface 1, move the right-most point upwards until it just touches Track 1:
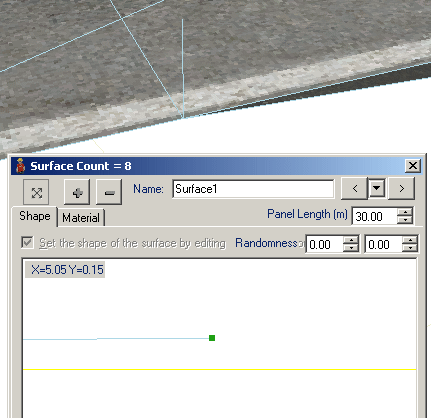
Each time Track 2 breaks the surface of Track 1, zoom in and move the point downwards.
Step 3a: Add the First New Point
This step is kept seperate because it may not be necessary. For this tutorial it's better to do it anyway.
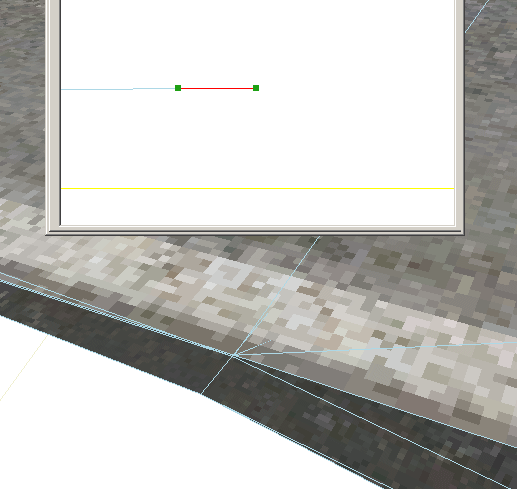
Select Surface2 and zoom in both in Top view and in the Surfaces window. Keep the right-most point in view. You need to add a new point which lines up with where the surface of Track 2 meets the edge of Track 1:
Hold down Ctrl to create the new point, and keep it held down until it's in the right place.
You will see a new line which runs along the entire length of Track 2: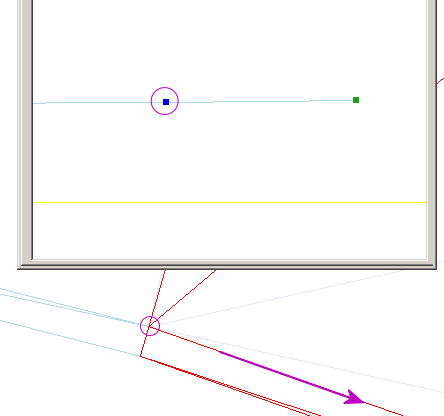
The two points on the right need to be dragged upwards until the inner point touches Track 1:
Always keep an eye on the X coordinates of the points so that you don't drag them in or out (within reason), just up and down.
Next, go to Surface3, and create another point which lines up with where it meets the edge of Track 1:
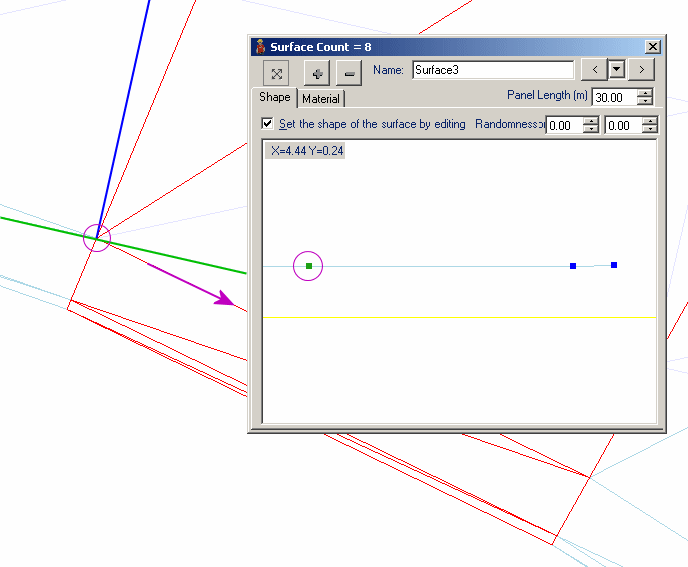
At this point you should look at previous surfaces of Track 2:
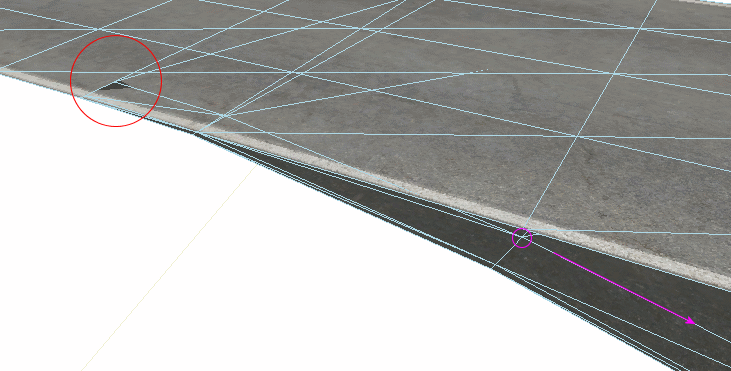
Creating this second point has caused the Track 2 to break the surface of Track 1. You need to go back to the first surface of Track 2 and lower this point so that once again it's underneath Track 1.
Go back to Surface3, and drag the three right-most points up until the new point touches Track 1:
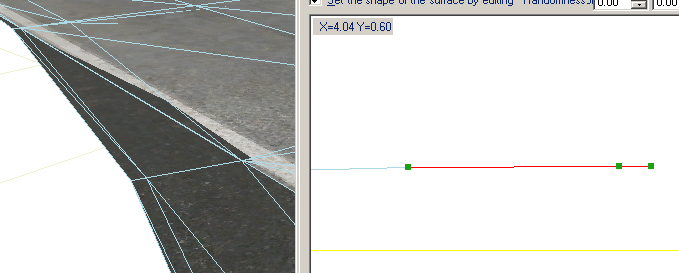
You can see another problem was developed, since Track 2 has broken through again. Go back to the previous surface, and drag the new point downwards. It won't need to move too far. If necessary, you can then go back to Surface3 and fine tune the new point even more:
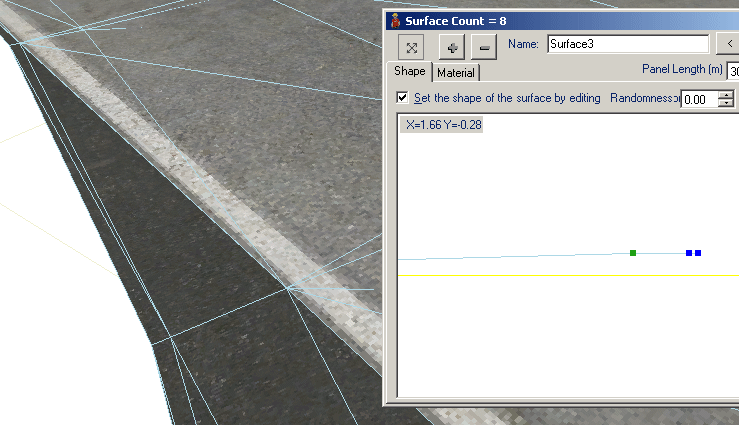
If you zoom in in the Surfaces window, you can get very precise control over the points.
Go to Surface4 and add a new point which lines up with where the surface meets the edge of Track 1:
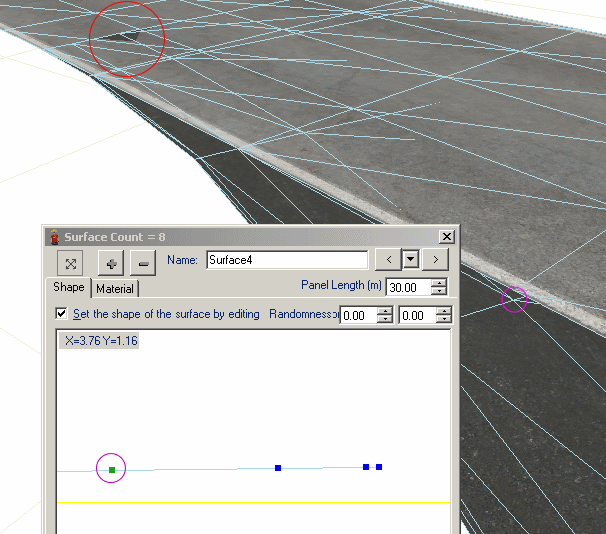
This has also caused Track 2 to break through Track 1.
Go go back to Surface1, move the point down, then go back to Surface4, and move all of the right points up or down, until the newest point touches the edge of Track 1:
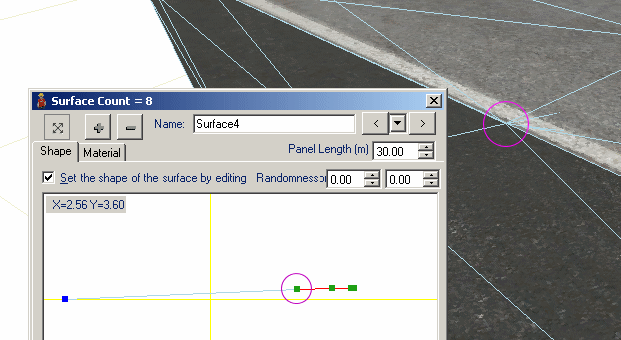
You may then need to go to Surface3 and move this new point down, or you may not.
Then you can go to Surface5 and do the same things: Add a new point in the cross-section, where it meets the edge of Track 1, check previous surfaces to make sure this new point isn't breaking through Track 1, and edit those surfaces as necessary, then go back to the current surface, and move all the right-hand points upwards, until the newest point just touches the edge of Track 1.
Once you get to the final surface (the surface you added in Step 1), you can move all the points upwards until the left-most point touches Track 1. Remember to look at the earlier surfaces and lower any points which now cut through Track 1.
The final thing should look something like this:
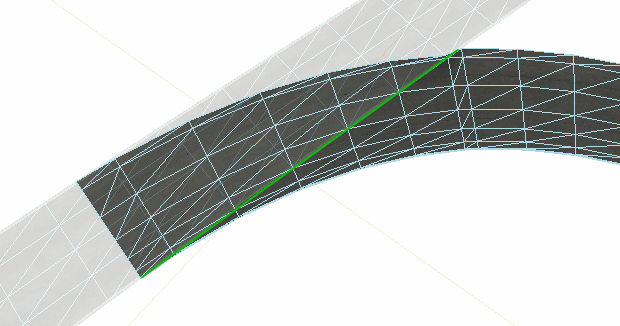
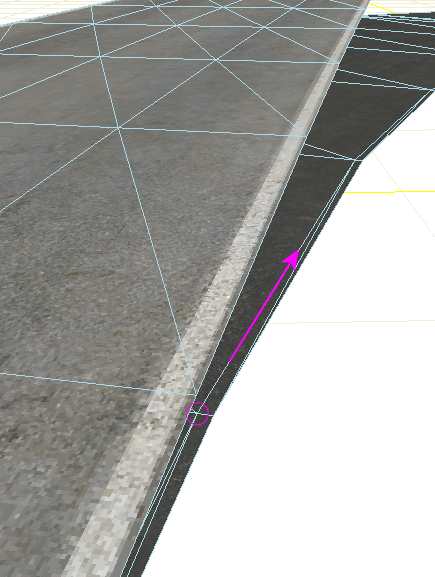
Note how the long sides of some of the triangles of Track 2 line up with the edge of Track 1. That's why this method works very well in this example, but not so well when Track 2 bends to the left of Track 1.
Step 4: Sorting Things Out
You might have ended up with a very strange cross-section for Track 2, especially if Track 1 has a very steep, or varying, gradient. That can be sorted out by adding yet another new surface, some distance after the two tracks' separation: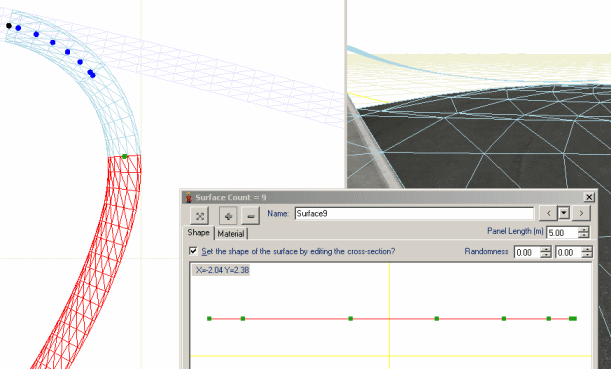
You can edit the cross-section of this surface so that it is as flat as you want. The penultimate surface will then become smooth by the time it reaches the final surface. The exact location of the final surface is up to you.
Another problem which might have developed is that Track 2 ends up with a very high camber, or there's a hump relative to Track 1:
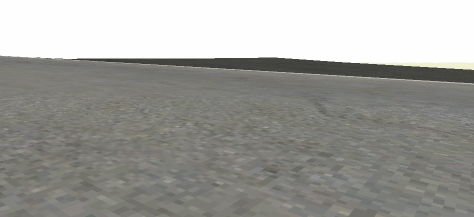
In this case you can go though each surface, and move the points up and down until Track 2 has a reasonable combination of gradient and camber:
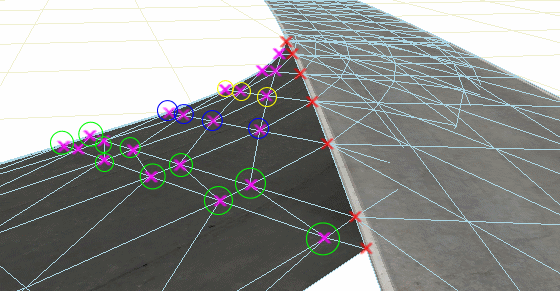
Don't move the red points, because they need to stay touching Track 1. You could start by adjusting the green-circled points, then the blue-circled points. Maybe then the yellow-circled ones, and probably not the ones which aren't circled.
Before moving these points it would be useful to drive over the intersection in rFactor, several times, to get a feel for what changes, if any, you need to make.
Summary
This method is very precise, and the results of each action are easy to predict (or they will be once you get the hang of things). However, as you can see in the final screenshot, the second track can end up with quite a lot of polygons.Another problem will arise if this track has to rejoin either Track 1 or another track. If it becomes necessary to add more points to the cross-section, it could become very hard to see which points correspond to which lines along the track.
In some ways this can be fixed by using a third track to rejoin the main track:
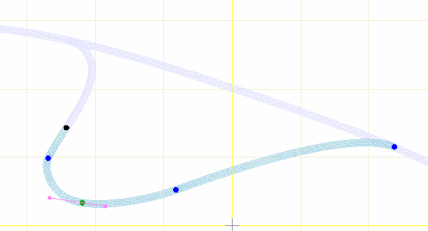
Of course you'd still have to join Track 3 to the end of Track 2, but you can ensure that they meet where they are both straight (or have the same curvature), and where they both have a constant gradient. In those cases, track merging is quite a bit easier.
However, if you zoom in, you'll see that since the hypotenuses can no longer by manipulated to match the edge of Track 1:
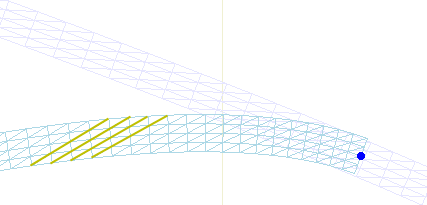
This will cause you the same problems as you would have with Track 2 curving to the left of Track 1.
This brings us on to the final problem, not that I want to sound too negative: If Track 2 bends to the left of Track 1, this method isn't as precise. When testing, I found I was able to get a good join, but when I tried to fix the cambers and humps, the polygons started intersecting in ways which were difficult to counteract.
If the directions of the triangles' hypotenuses could be reversed, this problem would be solved, i.e. if we could change a track (or specific surface) from the image on the left to the image on the right:
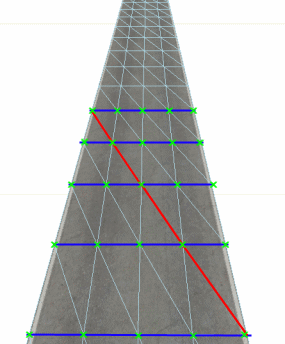
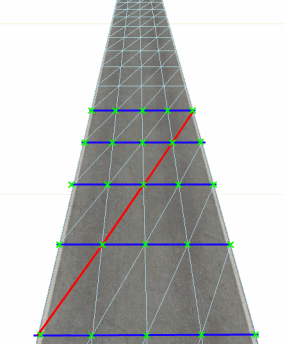
That is why this is a partial solution, not a full one. However in the right circumstances, it works very well indeed.
R Soul
